


Riding a bike that doesn’t go anywhere seems simple, but if you’re intimidated to try your first indoor cycling class, we get it. There’s a lot to think about. From proper bike height and form to clipping in to following along with the instructor (in the dark!), knowing what you’re getting into can help you walk into class with confidence.
Before you clip in, we tapped expert indoor cycling experts to give you all the info you need to make you a pro in the saddle. Plus, certified indoor cycling instructor Darryll Peterson, who teaches at REV Cycle Studio, demonstrates proper form and shows you how to clip in and out in this comprehensive indoor cycling guide.
What are the benefits of an indoor cycling class?
“Mental, physical, and spiritual release! Wow, that’s woo-woo, but holds truth,” Karen Maxwell, ACE-CPT and Senior Master Instructor for CycleBar tells Lively.
Physically, indoor cycling is a cardiovascular workout. If your goals include losing weight, indoor cycling, combined with consistency and a proper diet can help you achieve them. Indoor cycling is high-intensity, but low-impact, meaning it’s easier on your joints than other forms of cardio (think repetitive pounding you may experience during running or HIIT).
“The mental and spiritual benefits are achieved through the release of endorphins during exercise, combined with a highly motivational instructor and killer music,” Maxwell says. “Upon completing class, you feel on top of the world!”
What should beginners know before their first indoor cycling class?
Manage your expectations. You are a beginner, so don’t try to perform at the same level as people who may be more conditioned than you in this format. Go at your own pace and don’t feel pressed to “keep up.” We have all been beginners once, so embrace the journey of starting something new.
“Also, never do anything that feels unsafe. At CycleBar, we pride ourselves on safety first in our classes. If something feels sketchy, refrain from participating,” Maxwell says.
Related Articles
How can you ensure proper form, especially in a dark room?
“Take cues from the instructor, not your neighbor,” Maxwell says. “A great instructor will scan the room and provide form cues throughout the ride.”
Since you can’t necessarily see your form in the dark, you should aim for vertical length when seated and horizontal length when riding out of the saddle, Maxwell explains. Focus on keeping your core engaged throughout the ride for support and balance.
Remember to check in with your body throughout class. Some signs that your form is off could include knee pain, which could stem from improper bike setup, which can cause your form to be incorrect. Another common complaint that Peterson hears from beginners is foot numbness. This typically means your shoes are tied too tight. “You want them tight enough you don’t wobble, but you don’t need to cinch them super tight,” Peterson says.
How often should you add indoor cycling to your routine?
Indoor cycling is great exercise and can be beneficial to athletes of all abilities because it’s a low-impact workout. So, figuring out how cycling fits into your routine will help you figure out how often you want to ride each week. If it’s your main workout, cycling for 30 to 45 minutes three to five times a week will yield the highest results. For others, cycling is great cross-training, as a way to get your legs moving on a recovery day or even can be used as a rehab tool in a supervised physical therapy program.
The key is consistency, Maxwell says.
“Reaping the physical benefits is a given, but the mental aspect and release this workout provides sets me up to be a better human,” Maxwell says. “My head is often cleared and refreshed after each class. For me, the mental, spiritual and emotional benefits far outweigh the physical at times.”
Sound good? We agree! Before you get started, here are some tips to prepare you to walk into that cycling studio with confidence.
Lively Tip: Get to class early. The front desk staff and your instructor will be more than happy to help you with proper shoe and bike setup before the lights dim.
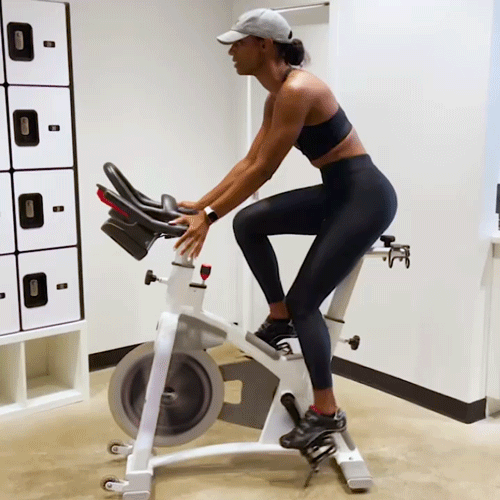
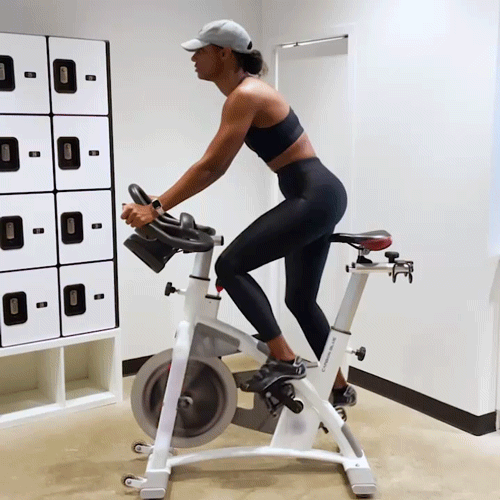
Seat Height
“The height of the saddle is the most important,” Maxwell says. “You don’t want to sit too low or too high.”
There are actually two ways to figure out your proper seat height, Peterson explains. The traditional way you may have heard of is by aligning the seat to hip-height. You can also stand next to the bike and then raise the knee closest to the seat to hip height and align the seat with your thigh.
Once you’re on the bike, you can double check how the height feels. You should ensure a slight bend in your knee when your foot is extended to the 6 o’clock position, Maxwell says.
“If you’re pedaling and your leg straightens out so much it locks out, your seat is too high,” Peterson says.
Lively Note:One other spot on the bike you can typically adjust is the handlebars. If you have lower-back pain or issues, raise your handlebars up. If you have shoulder pain or issues, lower your handlebars down, Maxwell says. Always check with your doctor before starting new exercise. And listen to your body is something doesn’t feel right—don’t do it.
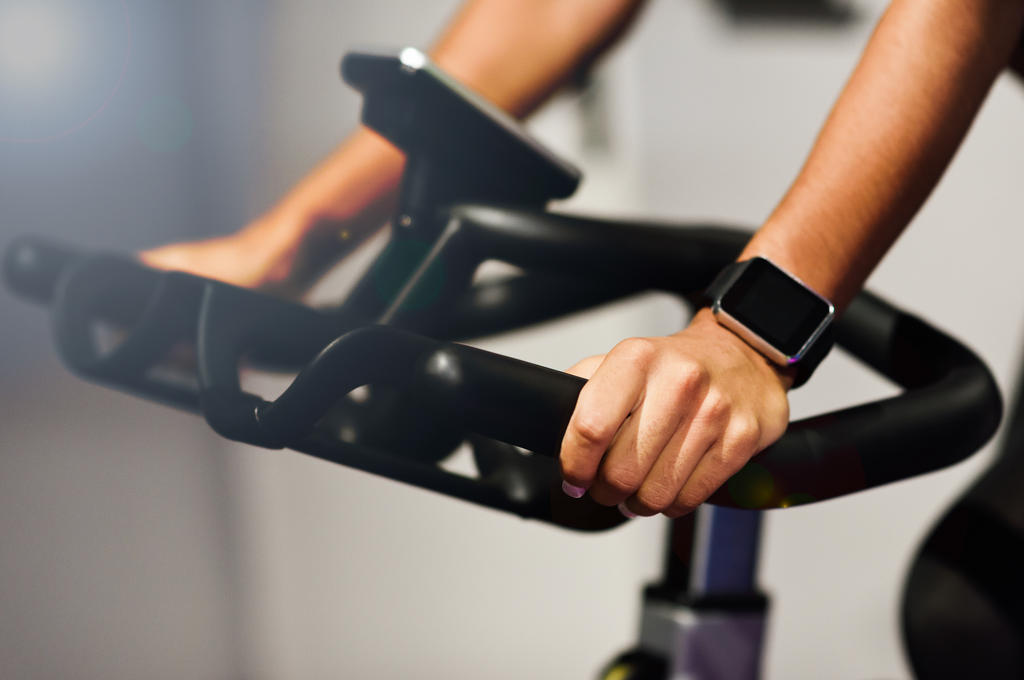
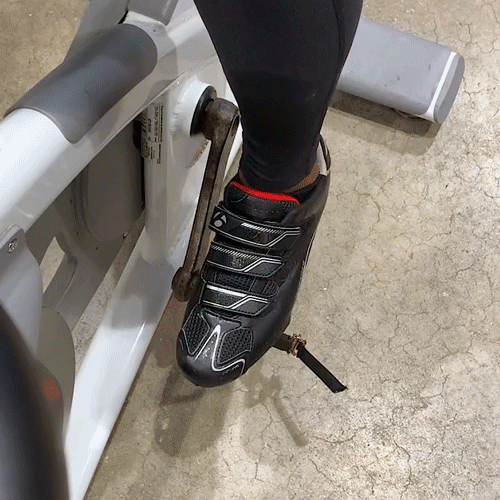
Clipping In
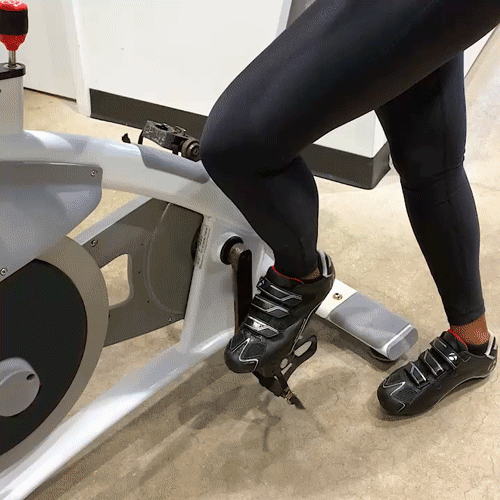
Clipping into the bike can be the trickiest part (aside from clipping out, but more on that later). The two most common types of cleats are SPD and Look Delta, and which is compatible with the bike you will be using varies by studio. Typically, you’ll be able to rent shoes in studio, so don’t worry about buying your own beforehand!
Clipping in will depend on what type of cleat you have, so this may vary bike to bike. You’ll check out where the cleat is (typically near the ball of the foot) and line up your foot with the pedal. Point your toes down and when you feel the cleat catch, push down through your heel until the shoe clicks in place.
This is why getting to class early is key—being able to see the shoe and pedal can be helpful. If you need help, don’t be shy. Once seated on the bike, if you need help, the instructor can help to guide your cleat into the pedal.
Proper Seated Indoor Cycling Form
When you’re clipped in, and comfortable with your bike setup, there are a few things to focus on for your form. You’ll want a slight bend in your elbows. Ensure your shoulders are down and away from your ears and your hands are resting lightly on your handlebars. You should engage your core to stay steady in the saddle—avoid resting your weight on the handlebars or gripping them too tightly. (Your goal is to be stable enough that you could remove your hands from the handlebars and continue riding.)
Adjusting Resistance
Each indoor cycling bike is slightly different, but typically there will be a red knob at the base of the handlebars where you can adjust resistance. Think “righty tighty, lefty loosey.” Turning the knob to the right will add more resistance, while turning the knob to the left will lower it.
You should always add more resistance before standing up out of the saddle to protect your knees, or if you are seated and your legs feel like they are out of control. When standing, there should be enough resistance that you don’t bounce up and down.
Adjusting resistance is one of the cues the instructor will give throughout class. Some bikes you adjust by rate of perceived exertion (RPE) and other bikes have computers which show metrics such as resistance and output that help guide you through class.
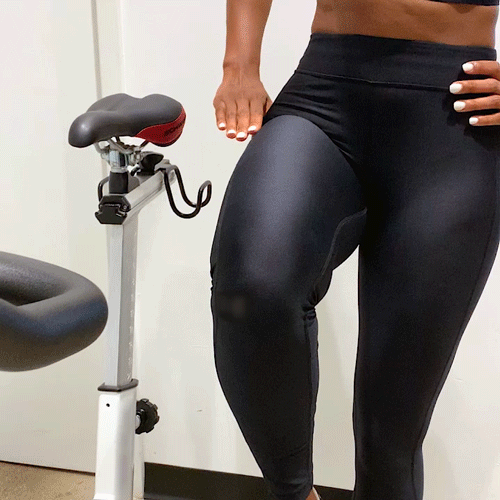
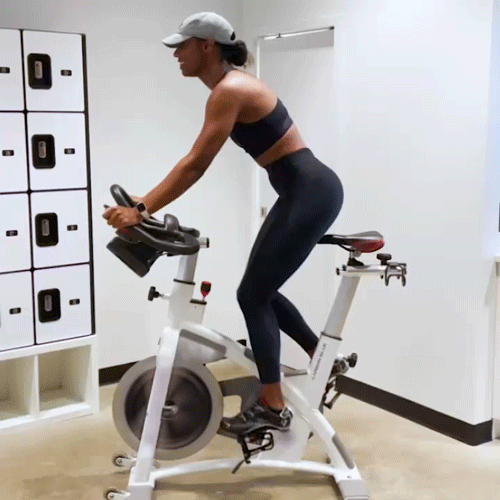
Standing Up
Standing up in the saddle usually comes later on in class, after the warmup, once you start to add resistance. If an instructor has climbs (which mimic cycling up a hill) built into class, you’ll often do these from a standing position.
When it’s time to move out of the saddle, there are a few things to keep in mind. As mentioned above, first adjust your resistance so there is enough support when you stand up. Your hand position will also shift. But, your upper body and core should stay in a similar position to when you are seated. Once you’re ready to stand, raise up out of the saddle in one fluid motion, keeping your core engaged.
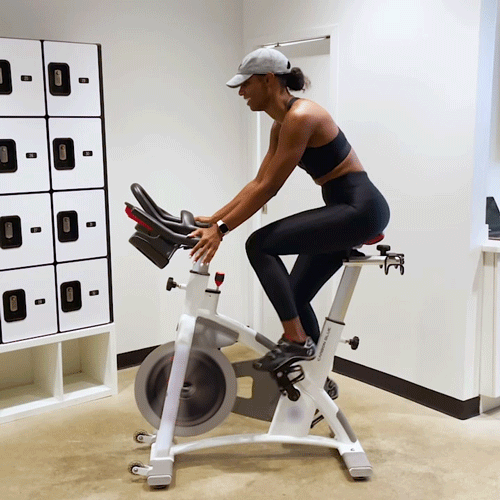
Proper Indoor Cycling Standing Form
Once you’re standing, there are a few hand positions your instructor will suggest, as demonstrated above by Peterson.
Just like when you’re seated, you want to keep your core engaged, strong posture through your upper body and relaxed shoulders.
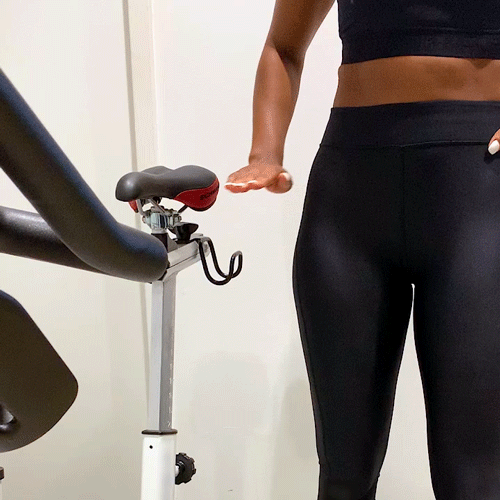
Clipping Out
You’ve successfully completed your first class! But there’s one final challenge, clipping out. Make sure you’ve pressed down on the resistance knob to bring your bike to a stop. Then, you’ll rotate your foot so that your heel goes out and toe goes toward the bike to unclip. Next, bring your foot off the bike to the side that your other foot is clipped in. Once your foot is planted on the ground, repeat the motion to clip out the remaining foot.
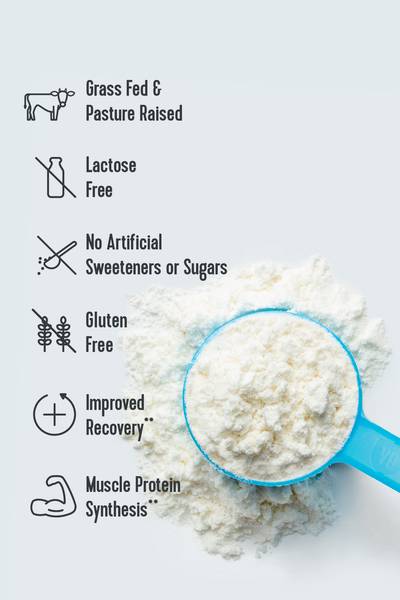
Vital Note: This article has been made available for informational and educational purposes only. It is not intended to be a substitute for professional medical advice, diagnosis, or treatment. Always seek the advice of your physician or another qualified health provider with any questions you may have regarding a medical condition. Your licensed healthcare professional can best provide you with the diagnosis and treatment of any medical condition and assist you as well in deciding whether a dietary supplement will be a helpful addition to your regimen.